Astro-Knights Island

The princess is missing! What's happened to her is for you to find out. You must travel to three distant and heavily armed planets to pick up the other three knights who failed to find the princess. Then you have to take them to the Crystal Gate, a bridge into the dimension of Mordred, a half-jester, half-robot madman whose dream is to rule the universe. He got that during the Villain Showdown, but this time you'll be stopping him!
Trailer
Poptropica Cheats for Astro-Knights Island
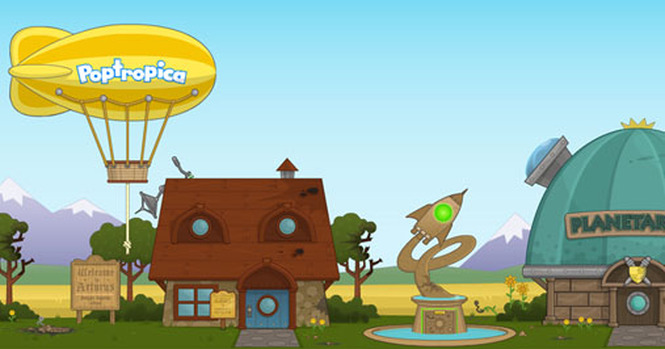
Quick diversion: The language on the Welcome to Arturus board ("Semper superne nitens") is Latin, and it means "Always striving upwards."
Let's find this princess. Run right until you find the fountain. Jump up and collect the twinkling coin, on the right side of the middle part of the fountain. Go into Mordred Museum to the left. Talk to the guy there, collect the pamphlet, then use the coin to be let in. Go to the top floor and run right. Click the stacks of books to get the library slip. Leave and go right, into the castle area. Enter and go right, through another smaller door. You'll arrive in the library. Go a little left and collect the book on the stand. Reach the far left and jump up to reach the green, twinkling book on the shelf. Return to where you found the stand, walk a bit right and look closely at the words there on the bookshelf... McM.
Let's find this princess. Run right until you find the fountain. Jump up and collect the twinkling coin, on the right side of the middle part of the fountain. Go into Mordred Museum to the left. Talk to the guy there, collect the pamphlet, then use the coin to be let in. Go to the top floor and run right. Click the stacks of books to get the library slip. Leave and go right, into the castle area. Enter and go right, through another smaller door. You'll arrive in the library. Go a little left and collect the book on the stand. Reach the far left and jump up to reach the green, twinkling book on the shelf. Return to where you found the stand, walk a bit right and look closely at the words there on the bookshelf... McM.
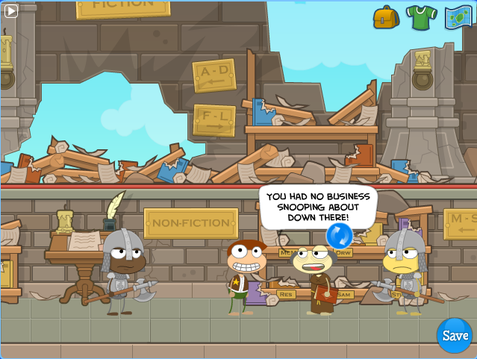
Hey, aren't those the underlined words from the library slip? Yep, they are! Click on a greenish brick behind it to open a hidden stairway in the ground. Obviously, go down it! Go right, collect that horrendous piece of cheese, and activate the switch on the wall. You'll open a gate near the robot in prison. If you try to talk to him, he will reply in binary (computer language.) The translation is "BARD". Leave the room. Uh-oh! What's this? Hmm... perhaps there was something down there you shouldn't have seen? This island is freaking me out!
Leave the library and enter the door to the far left. Talk to the lady there. She thinks she may be responsible for the princess's kidnapping, because she was taking messages for her to a secret society. Now grab the note on the dresser, the next one she was supposed to deliver for the princess. It reads, We must change our password! I feel my parents will find out what we are doing and put an end to it! The princess isn't looking so innocent after all...
Use the hideous cheese in your backpack to catch the mechanical mouse. Wait, didn't Mordred used to conduct experiments with DNA and mechanics? Shiver. Now exit this room. Go to the top floor of the palace. Enter the room there, and talk to the king and queen. She will give you the coordinates for the three other knights who failed to retrieve the princess. Leave the castle. Run all the way to the right of the island, Ye Olde Rumour Mille. Collect the rope at the top of the ladder, by the mud. Then get back to the castle. Jump up and attach the rope to an arrow on the large crossbow. Aim up and left about 45* and now you have a tightrope to the princess tower! You may need to try this many times to get the angle just right. Collect the document there, and study the room. The princess was really into space!
Return to Mordred's House and grab the letter under the bed, on the top floor. It tell the coordinates of the nearby moon. Go all the way right, to Ye Olde Rumour Mille. Talk to the guy there, and he will give you a bag of manure. Barf! Now, (choke), run as fast as you can into the mill. Walk to the left and make your way up. Jump to the right to land near all the gears. Grab onto the rope there to detach the wood from the gears. Once you're done, drop off to land near the pale lady there. She will give you a password in exchange for the message you found in the castle. Leave the mill. Find the mill wheel and hop onto the left side to make it spin counterclockwise. Do this until the blue bubble at the top opens up, then go in. Use the manure to activate the hoverpad; it'll fly out. We'll come back to it later.
The piece of paper you got from the pale lady in the loft is the password for the Secret Order. At the fountain, press in the symbols from the paper (moon, Saturn-like planet, small star) and hit the sun in the middle. It will open and all the water will drain out. Go in, and talk to the last person there; she will give you a key. Now run back to Ye Olde Rumour Mille. Push the bales of hay outside right until they meet up with the rocks. Jump in between both of the stacks to separate them. Use the key to open the secret door to Mordred's Laboratory.
Inside, you'll find an owl, Merlin. He won't trust you now. Go up the rope again and then use the mouse. The poor creature will be crushed, but now Merlin follows you. Return to the lab and push the flimsy wall to the left until it disintegrates. Follow the tunnel.
Whoa! It's the dungeon in the library! You'll witness the robot self-destruct, leaving behind a glowing fuel rod. Darn! It landed outside the cell! Fortunately, Merlin can help you. Click on him, then on the rod. He will fly over there and pick it up for you! Jump on the hoverpad on the swamp. You will fly over to Excalibur, a wrecked ship from the invasion. It needs a power source. We're all out of manure (mercifully), but the fuel rod can be used! Remember the coordinates from the queen and the paper under the bed? Those are absolute locations of planets in space. The fuel rod doesn't have enough energy for any of them, but we'll try that techy moon Mordred was talking about. Enter X-56, Y-52 (the coordinates from the old journal entry.)
Whoo! Off you go. But what's this? Low fuel. That darn thing!!! We're crash landing on Pewter Moon! BAM! Well, at least you're alive... you'll notice one thing about Pewter Moon, there's virtually no gravity! You can jump higher than ever! Run right and onto the moving platform. Once you're at the top, go into Astrozone and see the head mechanic up there to trade in your wreck. You'll also hear some talk about an evil Binary Bard. The last human who visited Pewter Moon was Mordred, 20 years ago. Go left to build your ship. Everyone says that the speed-shield balance is important, but let me tell you: in Astro-Knights you're much more likely to be horribly destroyed in one move than shot at. So I recommend more speed than shield. You can always come back later. Just don't worry about looks! When you're done, blast off!
How to Fly
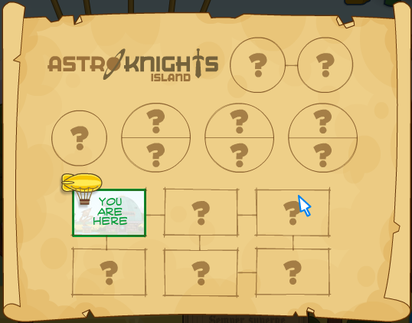
Okay, these are the basic guidelines on how to fly your cool new ship. It's very similar to the ship traveling part in Skullduggery, but these are here in case you forgot. Use your mouse to move; the farther away from your ship you mouse is, the faster you will go. Click to shoot ahead of you when you are under attack. It's smarter to speed away from your enemies than try to fight them, that's why I recommended more speed. You have a certain amount of hits your shield can take. You can see how many in the bottom bar. If you are shot down, you'll be teleported back to the orbit of Pewter Moon. Or you can hit the teleport button. The point is, when you're in orbit here, your shield will recharge. You have the coordinates of various planets. I assume you know how a coordinate plane works (you learned it in fifth or fourth grade, I forget.) The sun is centered at X-25 Y-42. Whatever you do, DON'T CRASH INTO IT!
The Jungle Planet (X-15 Y-15)
The Jungle Planet
Head for X-15, Y-15, the Jungle Planet of Arturus. It's mostly up and a little bit left, about 10-15*. You will be attacked by aliens. Basically, just dodge them, shooting them off occasionally. Once you've landed on the planet, leave your spaceship and drop down to the ground. Go right until you see the Laser Lance on a pedestal in a spotlight. Remember the "Mystical Weapons of Arturus"? Collect it, then jump onto the pink spring-flower to the left. By "spring" I don't mean the season. Soon it will launch you straight up! Get what I mean? Move a little in the air, to land on the next flower, to your right. Keep going this way until you reach your spaceship again.
Use the swinging platforms to make your way right. Don't fall, and don't get SHOCKed by the electric mutant caterpillars! The trick is to jump off while your platform is moving backward, so you land just in time and low enough. If you're good, you'll get it on your first try. Go right. Here you'll find the first knight that tried and failed to retrieve the princess. Talk to him. Now climb up the vine a little. What you have to do is make it across the shells and to the cage at the other side. The idea is to time your jump, and jump high. Don't stop moving! Now jump off and onto the first egg when it closes. When the one to the right opens, jump over the bird and onto the third. Now jump straight up to the cage. Wha... HEY! That's not the princess! Uh-oh, the mighty Mother Phoenix is coming! Break open the cage with your Laser Lance, and ride the Pegasus.
Now you must reach the Mother Phoenix, while avoiding her flies and rockets. Click to fire your Laser Lance. It's wisest to keep moving, instead of shooting EVERY SINGLE FLY. Avoid the thunderclouds by moving across them quickly and then moving back slowly. Stay near the left of the screen. Do not try shooting the flies, but instead keep your lance fully charged to shoot the red missiles. Soon you'll reach the ferocious Mother Phoenix. It's a good thing you have the Lance fully charged. Each time you see her, empty a full blast right onto her beak. She will fly away. Then she'll come back. What you gotta do is shoot her three times in all to see her break apart. Careful, she can come out from anywhere; you can see her in the background shadows!
When you are done you'll find yourself in the spaceship with Sir Cador. You need all three to go through the magical gateway the Princess talked about. Time to visit your next destination... the Fire Planet!
The Fire Planet (X-83 Y-20)
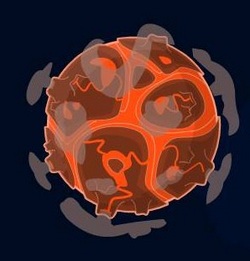
The Fire Planet
In case you've been shot, or you can to avoid the aliens, teleport immediately to Pewter Moon after you launch. From there, fly to X-83, Y-20. For this go up and right, but a little more up. You don't want to hit the black hole! Same story as before for the aliens. Once you've landed, keep jumping across the moving platforms to the right. This is pretty simple; just don't fall down! On the last one, jump while both rocks are moving DOWN. Jump left and onto the volcano. Go in. Now this next part is tough... you have to make your way to the bottom right of the volcano while avoiding the volcanic gas, which will push you back. You need to hide in the alcoves to achieve this. Basically,
- drop down left
- run right and take cover under the ledge
- hop on top and run left; drop down and go right
- hide in a pit
- hide in the next pit; this is tough to get to
- make you way up
- drop down right and discover the source of the gases
Like the Mother Phoenix, you have to get this guy thrice to beat him. But this time, you have to do it while not being burned to a crisp by the heat. The meter at the right will tell how close you are. Now climb the chains up top and work your way left. Dodge the magnetic spike ball at his tail and reach the lever on his back. Click it, and then he will freeze. As fast as you can, run (not jump) in front of him and fire an Ice Arrow directly into his open mouth. Repeat this process twice more, but the other times are hard because of the stalactites falling from the ceiling (for the first few seconds) and fireballs (only in front of the beast). When you're all done, he will jump up and down in agony, finally breaking the floor and plunging to his "death." Hey, did you notice that all these beasts are mechanical? Mordred probably made these as decoys, 'cause there's no princess here!
Grab Sir Peleas and blast off in your ship with the two knights toward the legendary Ice Planet. Same procedure, return to the Pewter Moon. The Ice planer is about 45* down and right of there. But... don't get too close.
The Ice Planet (X-73 Y-83)

The Ice Planet
No aliens! Whoopee! Open sesame! But wait... dag nabbit, robotic space sharks! What you have to do now is shoot at all three of them, so they will start following you. Take them up, to the black hole at X-85 Y-47. Veer quickly off to one side when you see the warning message, then try to make a wide turn around the other side of the hole. The sharks will try to take a shortcut through the hole, but will end up dead. (is there a lesson here? debate...) Now go back and land on the Ice Planet. This part is similar to the Fire Planet; jump across the slippery ice platforms to reach the other side. Avoid robot fish because they will knock you into the frigid water. The key is to jump high, and take two at a time. This will also give you added precision for landing on the platforms. Climb the snow mountain at the right. There's the third and final knight! He will give you a force field.
Now we'll beat the big panther dude. This is too easy! All you do is deflect it's snowballs back at him. Jump up while they fall down for more power. Once you get a hit, he will come down and try to shoot you. Jump up, as close to him as possible but not directly in front. Repeat this process until he is defeated. When he throws the arrows, jump through when there is a gap in the stream. And if your force field runs out of power, which it will, then just dodge its hits, and soon the field will come back, fully charged. The third knight (Gawain) will come with you... now you have all the knights! You know what that means...
The Crystal Gate
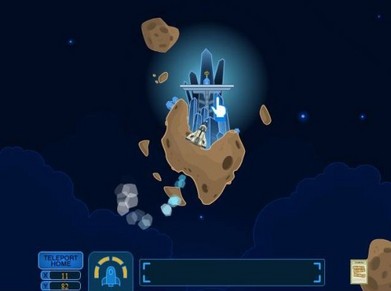
The Legendary Crystal Gate
Make sure to recharge fully before continuing. You will be reaching an asteroid at approximately X-11, Y-82, that is NOT on your map. It's about southwest of the moon. Fly there, but beware of the sun! You can't miss it; just spin around it if you spot it. Now you will meet up with the Asteroid Belt. It's fairly easy to dodge or shoot the asteroids, and the absolute lowest sheild can take 3 or four hits. Once you've safely reached the Crystal Gate (it looks like a rock with spikes sticking out of it), you will need to climb up the crystalline mountain. That's easy. The three knights will be with you (Sir Cador, Peleas, and Gawain.)
Read the message on the block. YOU are the chosen one. Only YOU can remove the key! Let's do just that and... whoa! A portal into another universe! The universe of Mordred. Go in. Hah! The princess! Finally! All these other places have been dead ends... she's asking for the weapons. Give 'em to her. Uh-oh! She's the Binary Bard in disguise! Not the princess! Mordred! He will disappear into the wall. Go down there, and solve the puzzle like so (left to right):
- press each card (or card space) in row #2 once
- the two middle cards of row #3
- all of them in row #4
Go into the puzzle/door to find Mordred again. Merlin the owl must now defeat Mordred's mechanical robot warrior. Wait... you're controlling him! What you have to do is dodge the flying discs and swoop down to the floor near the robot. There are bombs dropping, and exploding, there. Collect a fresh one and fly up, hovering about two-three inches above the robot. When it starts flashing red, drop the bomb onto Mordred's green orb of power. Do this easy part twice. Try not to waste too much health! Mordred will laser Merlin. Now he will attack you, but you only have whatever health is left from Merlin's fight!
As Merlin falls down, dodge the red laser beam and duck as the blades come over you. Time it so you can jump up the robot without being hit by the blades. Make your way onto the pedestal. Dodge the zaps and watch out for the spinning arms. Talk to the princess (the REAL one), then jump left or right to a chandelier. When Mordred fires at you, he will hit the chandelier and it will crash down on him. Do the same for a chandelier on the other side, and the orb will fall from the warrior as Mordred, a.k.a. the dreaded Binary Bard climbs out. The Princess knocks him out before he can grab the orb again. Congrats! You have defeated the notorious Binary Bard! Peace returns to Arturus as the orb is restored to it's rightful place, in the rocket on the fountain. You will be knighted and given a solid golden medallion for your bravery. (I'm Sir Hawk. Not exactly Round Table, but t's got a nice ring to it, hmm?) I hope that princess learned a lesson!

